Securing Gatus with OIDC using Auth0
At the request of some, I’ve decided to go through the process of securing Gatus with OIDC (OpenID Connect) using Auth0’s free plan.
Of course, this tutorial assumes that you’ve already set up Gatus besides for the OIDC configuration.
While we’re going to be using Auth0 for this tutorial, the process is more or less similar for every OIDC provider.
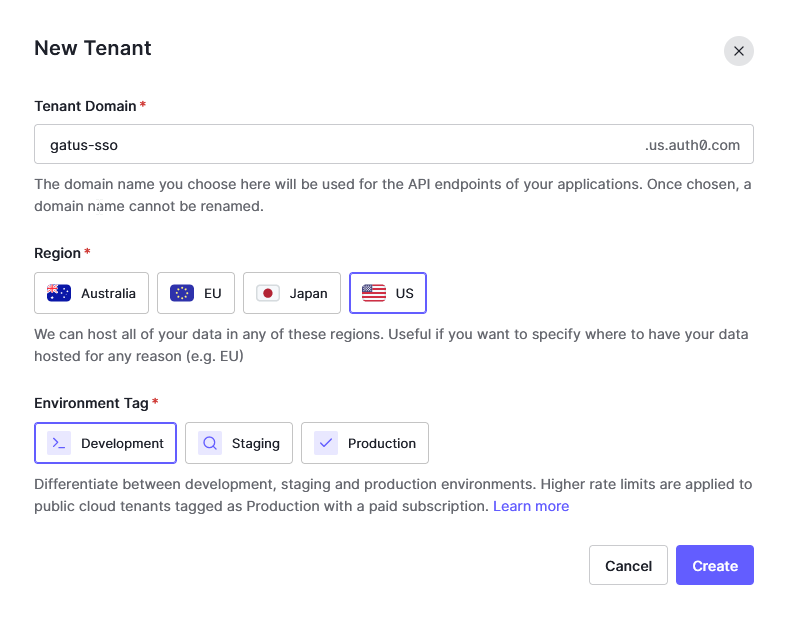
Once you’ve created an account on Auth0, you’ll have to create what Auth0 calls a “tenant”. As far as we’re concerned, this will provide you with a hostname that we will use as issuer URL, and a way to manage users.
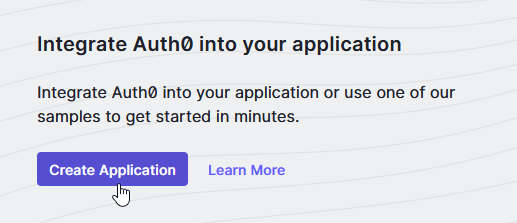
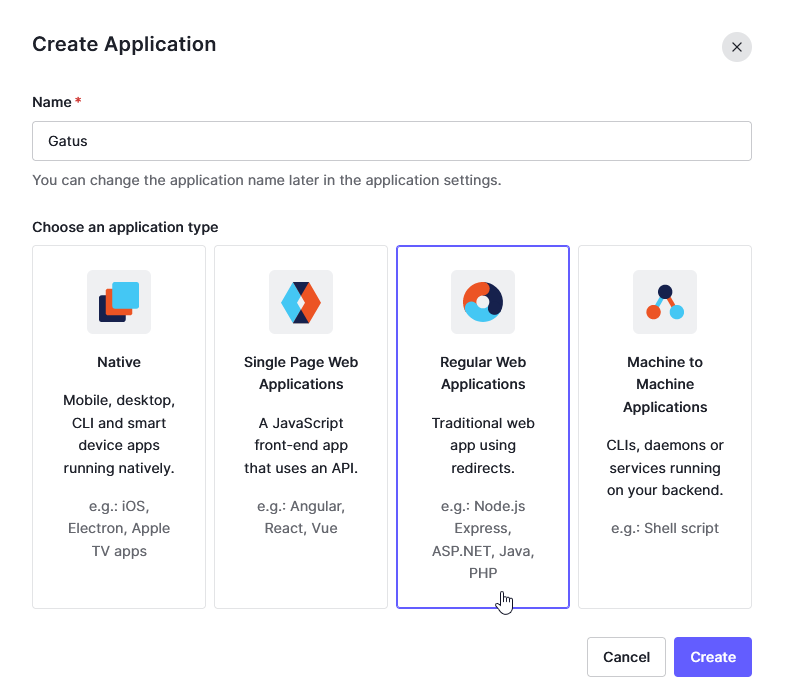
After creating a tenant, you’ll have to create an application (or you can use the default one if you prefer). Different platforms may refer to this differently, but essentially, it’s going to provide you with the following: - A client ID - A client secret - A way to manage your users - A way to configure the redirect URL
You’ll be prompted to select the type of application you want to create. Select “Regular Web Application”.
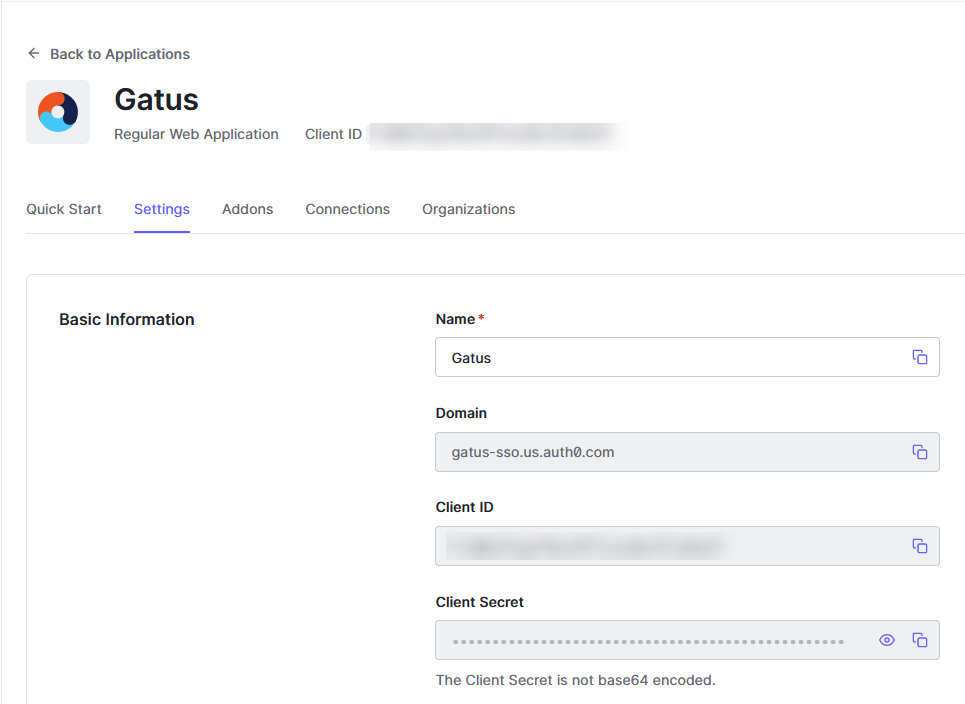
After creating the application, you should be redirected to a page which contains the domain, client ID, and client secret.
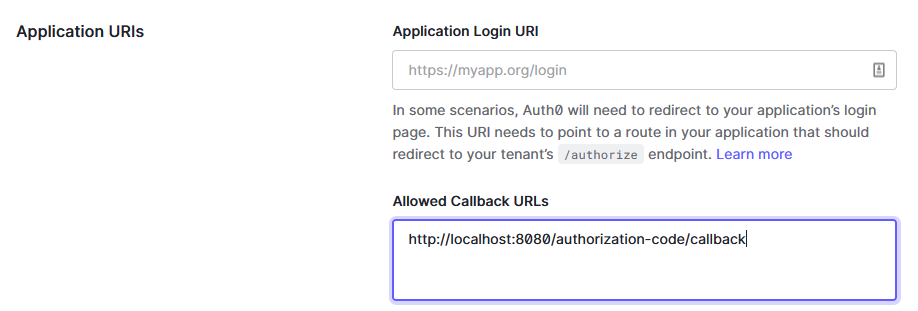
If you look around, you should be able to find an input labeled “Allowed Callback URLs”. This is where you’ll have to set the redirect URL.
For this tutorial, I’m going to use http://localhost:8080/authorization-code/callback because I’m running Gatus locally,
but if we exposed Gatus instance through https://status.example.com, we would set it to https://status.example.com/authorization-code/callback instead.
Make sure to save your changes.
At this point, our Gatus security configuration should look like this:
security:
  oidc:
    issuer-url: https://gatus-sso.us.auth0.com/
    client-id: "YOUR_CLIENT_ID"
    client-secret: "YOUR_CLIENT_SECRET"
    redirect-url: http://localhost:8080/authorization-code/callback
    scopes: [openid]
The scope is pretty much always going to be openid, but because some platforms like to unnecessarily rename standard
scopes for no reason, this is configurable.
If you were to try to access Gatus with the configuration you have now, it would work, but because we’re not specifying
security.oidc.allowed-subjects, it would allow anybody to sign up and access Gatus. We don’t want that, and there’s
two ways to go about fixing this:
1. Disable sign ups (this only applies to platforms that allows guests to sign up, such as Auth0)
2. Specify security.oidc.allowed-subjects
I recommend doing both.
To disable sign ups, navigate to Database under Authentication and click on the first item listed.

You should see Disable Sign Ups section at the end of the page.
Even though we’ve disabled registration, we can still create users manually. Navigate to Users under User Management and create yourself a user.

Make sure that the connection is set to the same name as the connection you disabled sign ups on.
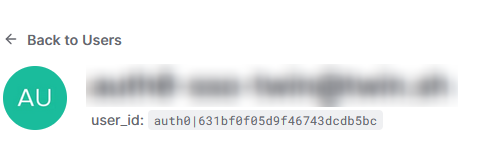
Once you’ve created the user, you should be redirected to the user details page where you’ll find user_id.
This is the subject.
Now, we can add the subject to security.oidc.allowed-subjects in our Gatus configuration, and only the user we’ve
made will be able to access our secured Gatus dashboard.
Your final configuration should look similar to this:
security:
  oidc:
    issuer-url: https://gatus-sso.us.auth0.com/
    client-id: "YOUR_CLIENT_ID"
    client-secret: "YOUR_CLIENT_SECRET"
    redirect-url: http://localhost:8080/authorization-code/callback
    scopes: [openid]
    allowed-subjects: ["auth0|631bf0f05d9f46743dcdb5bc"]