How to install Ubuntu Server 16.04 on a Raspberry Pi 3
NOTE: There are multiple posts on forums claiming that Ubuntu Server 16.04 is very unstable on RPI3.
If what you’re really looking for is a minimal distro for RPI3 that has no GUI, I strongly suggest Raspbian Stretch Lite, as it is officially supported by Raspberry Pi. You can download the image here
If you want to use Ubuntu Server 16.04 anyways, download the image for RPI3 from here
If you want to use any other image, make sure it is compatible with RPI3 (ARM architecture).
Using Ubuntu
If the image you downloaded is archived (if the file doesn’t end with .img), navigate to it from your terminal and extract it.
unxz ubuntu-16.04-preinstalled-server-armhf+raspi3.img.xz
We’ll need gddrescue for this, so install it if you don’t have it:
sudo apt-get install gddrescue
Now, to find your micro SD card easily, execute the following command without your micro SD plugged in
lsblk
Output example:
NAME   MAJ:MIN RM   SIZE RO TYPE MOUNTPOINT
sda      8:0    0 238.5G  0 disk
├─sda1   8:1    0   200G  0 part
└─sda2   8:2    0    28G  0 part /
sdb      8:16   0 931.5G  0 disk
├─sdb1   8:17   0 800.1G  0 part
├─sdb2   8:18   0    30G  0 part
├─sdb3   8:19   0     1K  0 part
├─sdb5   8:21   0  23.3G  0 part [SWAP]
└─sdb6   8:22   0    28G  0 part
sdc      8:32   0 232.9G  0 disk
├─sdc1   8:33   0   128M  0 part
├─sdc2   8:34   0   100M  0 part /boot/efi
├─sdc3   8:35   0   900M  0 part
├─sdc4   8:36   0   124G  0 part
├─sdc5   8:37   0   996M  0 part
└─sdc6   8:38   0    90G  0 part
Plug your micro SD and execute the same command again.
lsblk
Output example:
NAME   MAJ:MIN RM   SIZE RO TYPE MOUNTPOINT
sda      8:0    0 238.5G  0 disk
├─sda1   8:1    0   200G  0 part
└─sda2   8:2    0    28G  0 part /
sdb      8:16   0 931.5G  0 disk
├─sdb1   8:17   0 800.1G  0 part /media/twin/HDD
├─sdb2   8:18   0    30G  0 part
├─sdb3   8:19   0     1K  0 part
├─sdb5   8:21   0  23.3G  0 part [SWAP]
└─sdb6   8:22   0    28G  0 part
sdc      8:32   0 232.9G  0 disk
├─sdc1   8:33   0   128M  0 part
├─sdc2   8:34   0   100M  0 part /boot/efi
├─sdc3   8:35   0   900M  0 part
├─sdc4   8:36   0   124G  0 part
├─sdc5   8:37   0   996M  0 part
└─sdc6   8:38   0    90G  0 part
sdd      8:48   1  29.7G  0 disk
└─sdd1   8:49   0  29.7G  0 part
The output between the two should be different, and that difference is the micro SD card. In the example above, sdd is the ‘name’ of the micro SD. It’s also important to notice that we’re using the root name, not sdd1.
Finally, execute the following command and make sure to replace sdx by the root ‘name’ of your micro SD. In the provided example, I’d have to change /dev/sdX to /dev/sdd.
sudo ddrescue -d -D --force ubuntu-16.04-preinstalled-server-armhf+raspi3.img /dev/sdX
Using Windows
If the image you downloaded is archived (if the file doesn’t end with .img), you can extract it using 7zip.
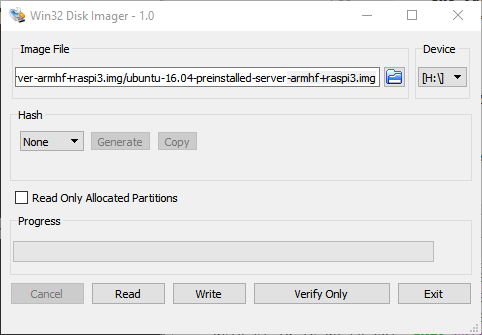
Download Win32 Disk Imager from here.
Plug your micro SD card and run the program. It’s pretty straightforward, but here’s what it should look like.
What next?
If you’re using Ubuntu Server 16.04, SSH should be enabled by default. The username is “ubuntu” and the password is “ubuntu”.
If you’re using Raspbian, The username is “pi” and the password is “raspberry”. However, SSH is not enabled by default on Raspbian. To enable SSH by default, connect the micro SD and create an empty file called “ssh” in the /boot partition (the same partition that contains “config.txt”).
As for finding the IP attributed to your RPI3, you can look for a new device in your router’s admin page. Alternatively, you can find out the IP by connecting your Raspberry PI to a display and executing the following command:
hostname -I
Q&A
Q: Can I use any image?
A: Because the RPI3 has an ARMv8 CPU, it won’t work with any images. It’s also possible to use other images made for ARM CPU, but as the image suggested was made specifically for RPI3, it should make your life less harder.
Q: I don’t have a display and I can’t access the router’s admin page, how do I get my RPI3’s IP?
A: Here’s a quick PHP script that will allow you to check for internal IPs that have SSH open:
$timeout = 0.1;
$ip = '192.168.0.';
for ($i = 1; $i < 256; $i++) {
    $host = $ip . $i;
    $connection = @fsockopen($host, 22, $errno, $errstr, $timeout);
    if (is_resource($connection)) {
        echo 'Port 22 (SSH) is open on ' . $host . PHP_EOL;
        fclose($connection);
    }
}